基于 STM32CubeMX 添加 RT-Thread 操作系统组件(十七)- CPU 利用率统计
本文共 6201 字,大约阅读时间需要 20 分钟。
概述
本篇只要介绍这么使用STM32CubeMx工具添加RT-Thread操作系统组件,码代码的IDE是keil。介绍单线程SRAM静态内存使用。如果还不知道,这么使用STM32CubeMx工具添加RT-Thread操作系统组件,请移步到《》文章阅读。好了,喝杯茶先^_^,继续前行。上一篇介绍关于《双向链表》
在实现这个功能之前,先去RT-Thread的源码仓库中获取,该文件在 rtthread--master\examples\kernel 路径下,名字叫cpuusage.c。 链接如下:一、STM32CubeMx配置
CubeMx参照上一篇文章介绍来配置即可,这里就不再做讲解了。
二、KEIL IDE
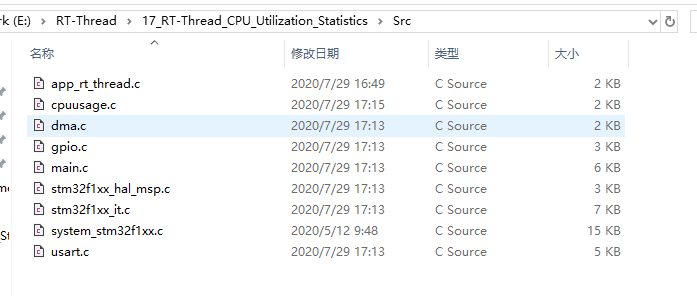
- 在keil 工程项目视图,Application/User文件夹,打开下载好源码,找到cpuusage.c文件,添加到工程中来,如下代码:
#include
#include #include "cpuusage.h"#define CPU_USAGE_CALC_TICK 1000#define CPU_USAGE_LOOP 100static rt_uint8_t cpu_usage_major = 0, cpu_usage_minor= 0;static rt_uint32_t total_count = 0;static void cpu_usage_idle_hook(){ rt_tick_t tick; rt_uint32_t count; volatile rt_uint32_t loop; if (total_count == 0) { /* get total count */ rt_enter_critical(); tick = rt_tick_get(); while(rt_tick_get() - tick < CPU_USAGE_CALC_TICK) { total_count ++; loop = 0; while (loop < CPU_USAGE_LOOP) loop ++; } rt_exit_critical(); } count = 0; /* get CPU usage */ tick = rt_tick_get(); while (rt_tick_get() - tick < CPU_USAGE_CALC_TICK) { count ++; loop = 0; while (loop < CPU_USAGE_LOOP) loop ++; } /* calculate major and minor */ if (count < total_count) { count = total_count - count; cpu_usage_major = (count * 100) / total_count; cpu_usage_minor = ((count * 100) % total_count) * 100 / total_count; } else { total_count = count; /* no CPU usage */ cpu_usage_major = 0; cpu_usage_minor = 0; }}void cpu_usage_get(rt_uint8_t *major, rt_uint8_t *minor){ RT_ASSERT(major != RT_NULL); RT_ASSERT(minor != RT_NULL); *major = cpu_usage_major; *minor = cpu_usage_minor;}void cpu_usage_init(){ /* set idle thread hook */ rt_thread_idle_sethook(cpu_usage_idle_hook);} 
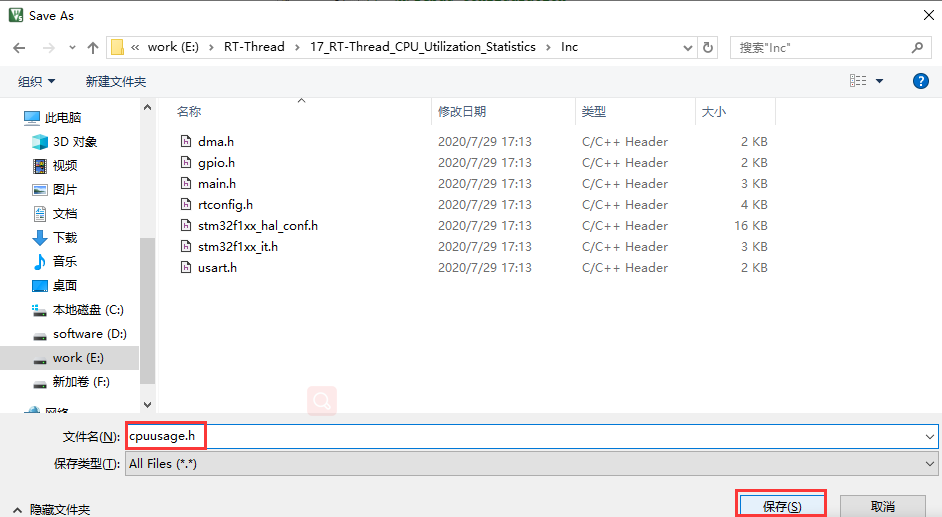
- 在Application/User文件夹,新建cpuusage.h文件,并添加如下代码:
#ifndef __CPUUSAGE_H__#define __CPUUSAGE_H__#include
#include /* 获取 cpu 利用率 */void cpu_usage_init(void);void cpu_usage_get(rt_uint8_t *major, rt_uint8_t *minor);#endif 
- 在Application/User文件夹,新建app_rt_thread.c文件,并添加如下代码:
#include "rtthread.h"#include "main.h"#include "stdio.h"#include
#include "cpuusage.h"/* 定义线程控制块 */static rt_thread_t led1_thread = RT_NULL;static rt_thread_t get_cpu_use_thread = RT_NULL;/* 函数声明 */static void led1_thread_entry(void* parameter);static void get_cpu_use_thread_entry(void* parameter);int MX_RT_Thread_Init(void){ cpu_usage_init(); rt_kprintf("This is an RTT-CPU utilization statistics experiment\r\n"); led1_thread = /* 线程控制块指针 */ rt_thread_create( "led1", /* 线程名字 */ led1_thread_entry, /* 线程入口函数 */ RT_NULL, /* 线程入口函数参数 */ 512, /* 线程栈大小 */ 3, /* 线程的优先级 */ 20); /* 线程时间片 */ /* 启动线程,开启调度 */ if (led1_thread != RT_NULL) rt_thread_startup(led1_thread); else return -1; get_cpu_use_thread = /* 线程控制块指针 */ rt_thread_create( "get_cpu_use", /* 线程名字 */ get_cpu_use_thread_entry, /* 线程入口函数 */ RT_NULL, /* 线程入口函数参数 */ 512, /* 线程栈大小 */ 5, /* 线程的优先级 */ 20); /* 线程时间片 */ if (get_cpu_use_thread != RT_NULL) rt_thread_startup(get_cpu_use_thread); else return -1;}/************************************************************** 线程定义**********************************************************/static void led1_thread_entry(void* parameter){ rt_uint16_t i; while (1) { HAL_GPIO_TogglePin(LED1_GPIO_Port, LED1_Pin); /* 模拟占用 CPU 资源,修改数值作为模拟测试 */ for (i = 0; i < 10000; i++); rt_thread_delay(500); /* 延时 5 个 tick */ rt_kprintf("CPU utilization \r\n"); }}static void get_cpu_use_thread_entry(void* parameter){ rt_uint8_t major,minor; while (1) { /* 获取 CPU 利用率数据 */ cpu_usage_get(&major,&minor); /* 打印 CPU 利用率 */ rt_kprintf("CPU utilization = %d.%d%\r\n",major,minor); rt_thread_delay(1000); /* 延时 1000 个 tick */ }} - 在main.c文件添加如下代码:
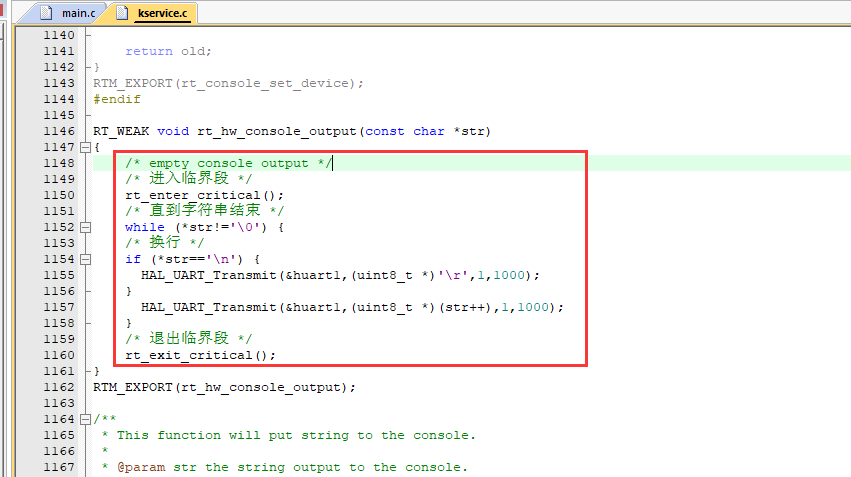
/* USER CODE END Header *//* Includes ------------------------------------------------------------------*/#include "main.h"#include "usart.h"#include "gpio.h"/* Private includes ----------------------------------------------------------*//* USER CODE BEGIN Includes *//* USER CODE END Includes *//* Private typedef -----------------------------------------------------------*//* USER CODE BEGIN PTD */extern int MX_RT_Thread_Init(void);/* USER CODE END PTD *//* Private define ------------------------------------------------------------*//* USER CODE BEGIN PD *//* USER CODE END PD *//* Private macro -------------------------------------------------------------*//* USER CODE BEGIN PM *//* USER CODE END PM *//* Private variables ---------------------------------------------------------*//* USER CODE BEGIN PV *//* USER CODE END PV *//* Private function prototypes -----------------------------------------------*/void SystemClock_Config(void);/* USER CODE BEGIN PFP *//* USER CODE END PFP *//* Private user code ---------------------------------------------------------*//* USER CODE BEGIN 0 *//* USER CODE END 0 *//** * @brief The application entry point. * @retval int */int main(void){ /* USER CODE BEGIN 1 */ /* USER CODE END 1 */ /* MCU Configuration--------------------------------------------------------*/ /* Reset of all peripherals, Initializes the Flash interface and the Systick. */ HAL_Init(); /* USER CODE BEGIN Init */ /* USER CODE END Init */ /* Configure the system clock */ SystemClock_Config(); /* USER CODE BEGIN SysInit */ /* USER CODE END SysInit */ /* Initialize all configured peripherals */ MX_GPIO_Init(); MX_USART1_UART_Init(); /* USER CODE BEGIN 2 */ MX_RT_Thread_Init(); /* USER CODE END 2 */ /* Infinite loop */ /* USER CODE BEGIN WHILE */ while (1) { /* USER CODE END WHILE */ /* USER CODE BEGIN 3 */ } /* USER CODE END 3 */} - 自定义rt_hw_console_output()函数,在kservice.c文件添加中(重映射串口控制台到 rt_kprintf 函数)代码:
#include "usart.h"...RT_WEAK void rt_hw_console_output(const char *str){ /* empty console output */ /* 进入临界段 */ rt_enter_critical(); /* 直到字符串结束 */ while (*str!='\0') { /* 换行 */ if (*str=='\n') { HAL_UART_Transmit(&huart1,(uint8_t *)'\r',1,1000); } HAL_UART_Transmit(&huart1,(uint8_t *)(str++),1,1000); } /* 退出临界段 */ rt_exit_critical();}
- 运行结果 源码:
转载地址:http://mpexz.baihongyu.com/
你可能感兴趣的文章
Node-RED中使用node-random节点来实现随机数在折线图中显示
查看>>
Node-RED中使用node-red-browser-utils节点实现选择Windows操作系统中的文件并实现图片预览
查看>>
Node-RED中使用node-red-contrib-image-output节点实现图片预览
查看>>
Node-RED中使用node-red-node-ui-iframe节点实现内嵌iframe访问其他网站的效果
查看>>
Node-RED中使用Notification元件显示警告讯息框(温度过高提示)
查看>>
Node-RED中使用range范围节点实现从一个范围对应至另一个范围
查看>>
Node-RED中实现HTML表单提交和获取提交的内容
查看>>
Node-RED中将CSV数据写入txt文件并从文件中读取解析数据
查看>>
Node-RED中建立TCP服务端和客户端
查看>>
Node-RED中建立Websocket客户端连接
查看>>
Node-RED中建立静态网页和动态网页内容
查看>>
Node-RED中解析高德地图天气api的json数据显示天气仪表盘
查看>>
Node-RED中连接Mysql数据库并实现增删改查的操作
查看>>
Node-RED中通过node-red-ui-webcam节点实现访问摄像头并截取照片预览
查看>>
Node-RED中配置周期性执行、指定时间阶段执行、指定时间执行事件
查看>>
Node-RED安装图形化节点dashboard实现订阅mqtt主题并在仪表盘中显示温度
查看>>
Node-RED怎样导出导入流程为json文件
查看>>
Node-RED订阅MQTT主题并调试数据
查看>>
Node-RED通过npm安装的方式对应卸载
查看>>
node-request模块
查看>>